
Ionic is an HTML5 hybrid framework based on Cordova and Angular which allows you to build native mobile applications for Android, iOS and Windows Phone. In this tutorial, we will show you step-by-step how to use streamdata.io in an Ionic application to display the ISS position on a map in real-time.
If you just want to run the sample, after having installed Ionic and cloned the GitHub repository, you just need to:
- Add one or more platform as explained in step two.
- Fill in your application token as explained in step three.
Install Ionic and every dependency needed
If you haven’t already, follow this guide to install Ionic.
1 – Create the Ionic application
Start a new project based on the maps template by running ionic start iss.io maps. This will build an Ionic project which displays a map.
If you’re working on Mac OS X, iOS platform has automatically been added to your project.
To add an Android platform, run ionic platform add android.
You can run your application in your browser with ionic serve command, in an emulator with ionic emulate [platform] or in your device with ionic run [platform]. If you want to read more about those commands and their options, have a look here for service and here for emulate and run.
When you run it for the first time, you should see a map centered on Ionic’s headquarters, a header bar with the title “Map” and a footer bar with a “center on me” button.
2 – Customize the application to match our needs
For our purpose, we need to display the map a little differently. Open the directives.js file in the www/js folder and follow the steps below:
- First of all, we’re going to extract the latitude, longitude and the
LatLngobject in variables as we’re going to reuse them. As we don’t know the exact position of the ISS at the moment, let’s use Cap Canaveral’s coordinates to start:var lat = 28.5072628; var lng = -80.6526204; var latLng = new google.maps.LatLng(lat, lng); - Then we’re going to change the
mapOptionsobject to display the map in a more convenient way for our use case:var mapOptions = { center: latLng, mapTypeId: google.maps.MapTypeId.SATELLITE, zoom: 4, minZoom: 4, streetViewControl: false }; - And finally, we add a
markerobject with a custom icon to show the ISS position (don’t forget to put the icon in thewww/imgfolder):var issMarker = new google.maps.Marker({ position: latLng, map: map, icon: 'img/iss_marker.png', title: 'ISS' }); - We’ll need the
MapCtrlto know theissMarkerobject later, so we add it as a parameter to theonCreatefunction:$scope.onCreate({map: map, issMarker: issMarker}); - Now we’re going to add the
issMarkerto themapCreatedfunction intocontrollers.js:$scope.mapCreated = function (map, issMarker) { $scope.map = map; $scope.issMarker = issMarker; }; - And obviously, we add it to the directive’s declaration too:
<ion-content scroll="false">
  <map on-create="mapCreated(map, issMarker)">
</ion-content>
You can also replace the header bar title in index.html by something more relevant like ISS Position and remove the code related to the footer bar and the “center on me” button for more readability if you prefer.
3 – Setting up the Streamdata.io event-source
To use the Streamdata.io proxy, you need an App Token. Register on the Portal to create an account and get a valid token. The Streamdata.io request for the ISS position looks like this:
https://streamdata.motwin.net/http://api.open-notify.org/iss-now.json?X-Sd-Token=[your-token]
As you can see, it is composed of three parts:
- https://streamdata.motwin.net/: the Streamdata.io proxy URL.
- Link: the API which will give us the ISS position.
- ?X-Sd-Token=[YOURTOKEN]: your Streamdata.io App Token.
Let’s call our request with a simple curl -XGET to see what the API send us:
event:data
data:{"iss_position":{"latitude":-5.154055625049744,"longitude":137.42699878015998},"message":"success","timestamp":1452186030}

event:patch
data:[{"op":"replace","path":"/iss_position/latitude","value":-4.891777641581724},
      {"op":"replace","path":"/iss_position/longitude","value":137.61496558611873},
      {"op":"replace","path":"/timestamp","value":1452186035}]
On the first call, the API sends us the object iss_position, whereas on the next call, it will send us updates in the JSON-Patch format.
Once you have your token, you can add the Streamdata.io JavaScript SDK and a JSON-Patch library to your dev-dependencies in the bower.json file:
"devDependencies": {
  "ionic": "driftyco/ionic-bower#1.3.2",
  "streamdataio-js": "https://github.com/axway-amplify-streams/axway-amplify-streams-js-sdk.git#v1.0.5",
  "fast-json-patch": "^1.1.1"
}
After running the bower install command to add them to your www/lib folder, declare them in your index.html file:
<script src="lib/streamdataio-js/dist/streamdataio.min.js"></script>
<script src="lib/fast-json-patch/dist/json-patch-duplex.min.js"></script>
Now we can open the streaming session in the MapCtrl in controllers.js. First, we need to create an EventSource object which takes your Streamdata.io App Token and the ISS API as parameters:
.controller('MapCtrl', function ($scope) {

  ...

  var sdToken = "your-token";
  var issApi = "http://api.open-notify.org/iss-now.json";
  var myEventSource = streamdataio.createEventSource(issApi, sdToken);
}
Then we need to register to two callbacks: onData to retrieve the initial document, and onPatch to retrieve updates:
myEventSource.onData(function (snapshot) { // initialize your data with the initial snapshot
  $scope.issPosition = snapshot;
});

myEventSource.onPatch(function (data) {    // update the data with the provided patch
  jsonpatch.apply($scope.issPosition, data);
});
Now that we retrieve the position, we need a method to update the map’s center and the ISS marker according to the new value:
function refreshMapAndISSMarker(){
var latLng = new google.maps.LatLng($scope.issPosition.iss_position.latitude,
$scope.issPosition.iss_position.longitude);
$scope.map.setCenter(latLng);
$scope.issMarker.setPosition(latLng);
}
Finally, we just need to call this method in our onData and onPatch methods and start the streaming session by calling the open method on the myEventSource object:
myEventSource.onData(function (snapshot) { // initialize your data with the initial snapshot
  $scope.issPosition = snapshot;
  refreshMapAndISSMarker();
});

myEventSource.onPatch(function (data) {    // update the data with the provided patch
  jsonpatch.apply($scope.issPosition, data);
  refreshMapAndISSMarker();
});

myEventSource.open();
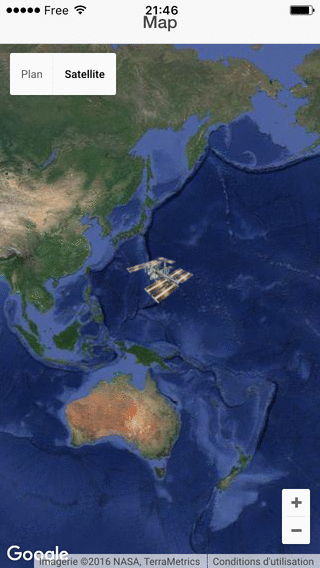
Et voilà! Our map is now showing the ISS position in real-time 🙂
Follow us on social